Setup SCIM on Okta
The following guide outlines how to setup SCIM for SSO on Okta.
Setup SCIM for your Okta application
Vouch supports SCIM as a way of informing your Vouch account when employees have left your business, allowing you to manage any content in your account associated.
Vouch recommends enabling SCIM provisioning on your Audience Users application. Steps for setting up both SCIM provisioning are listed below:
Enable SCIM provisioning
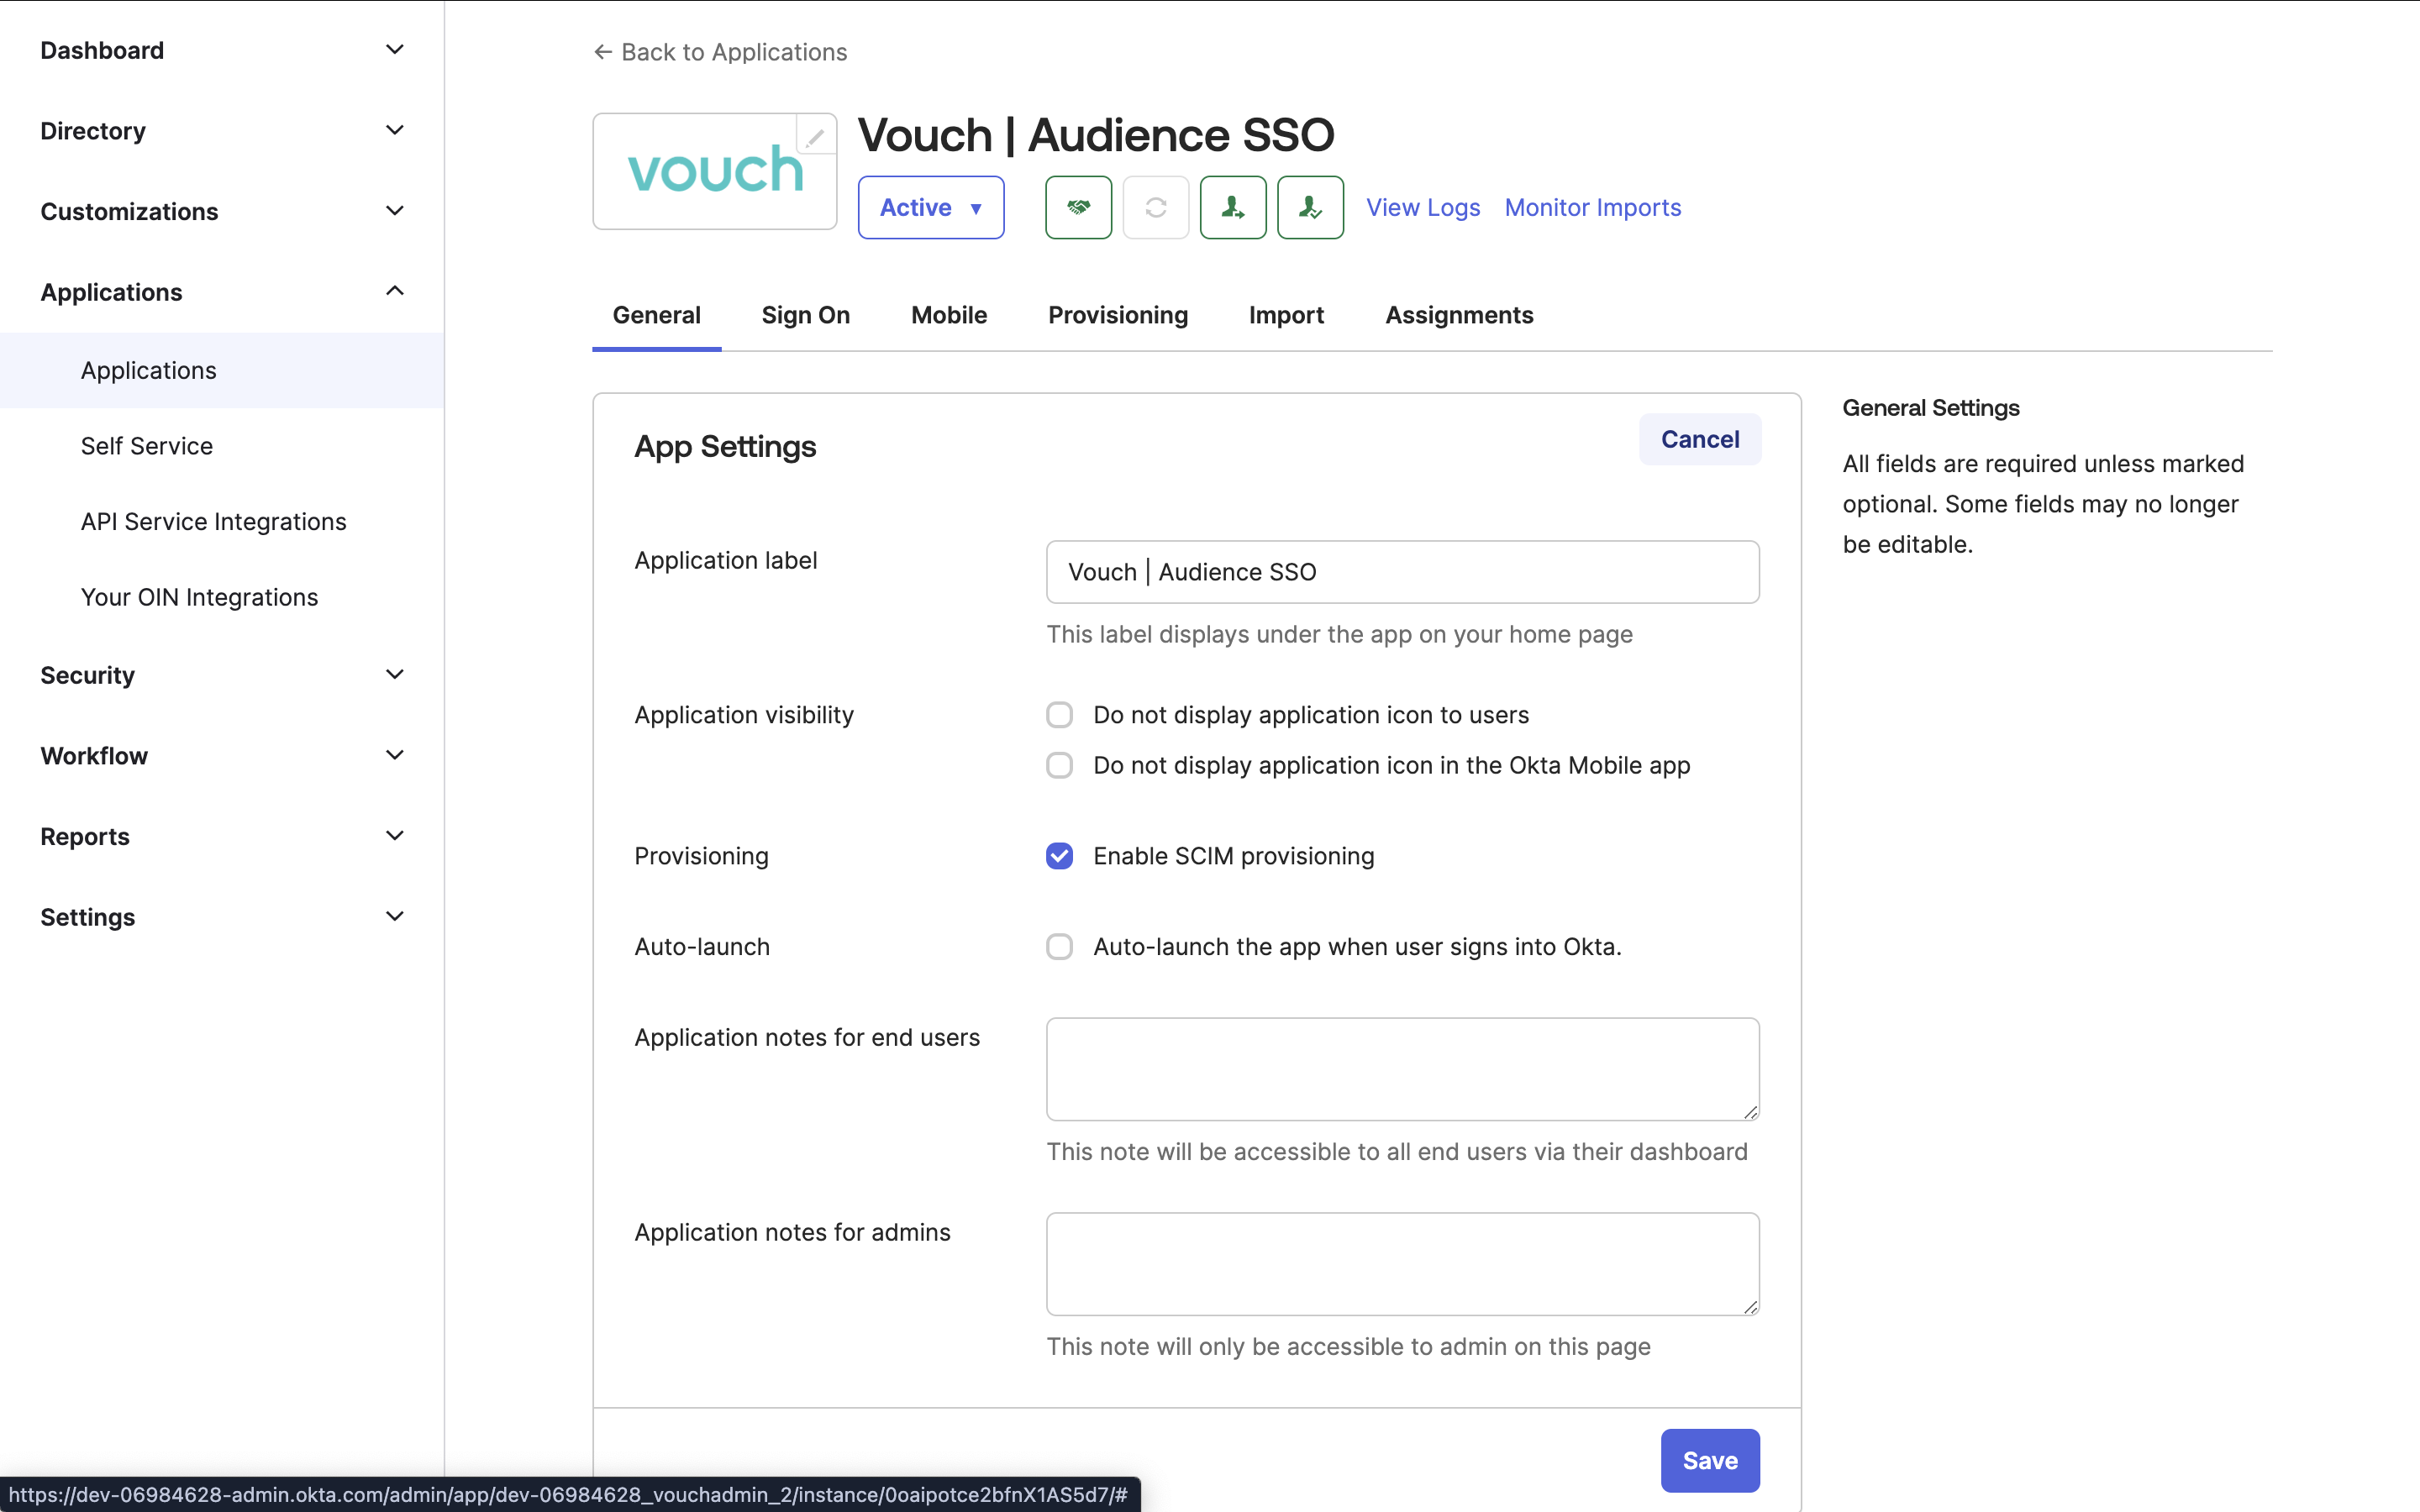
The first step in the process is to enable SCIM provisioning on your Okta SAML application. Navigation to Applications > Applications in the Okta menu and select the SAML application that you configured for the Vouch Audiences.
From within the application, click on the General tab and click on the Edit button.

Under provisioning, select Enable SCIM provisioning and hit save.
Configure Provisioning
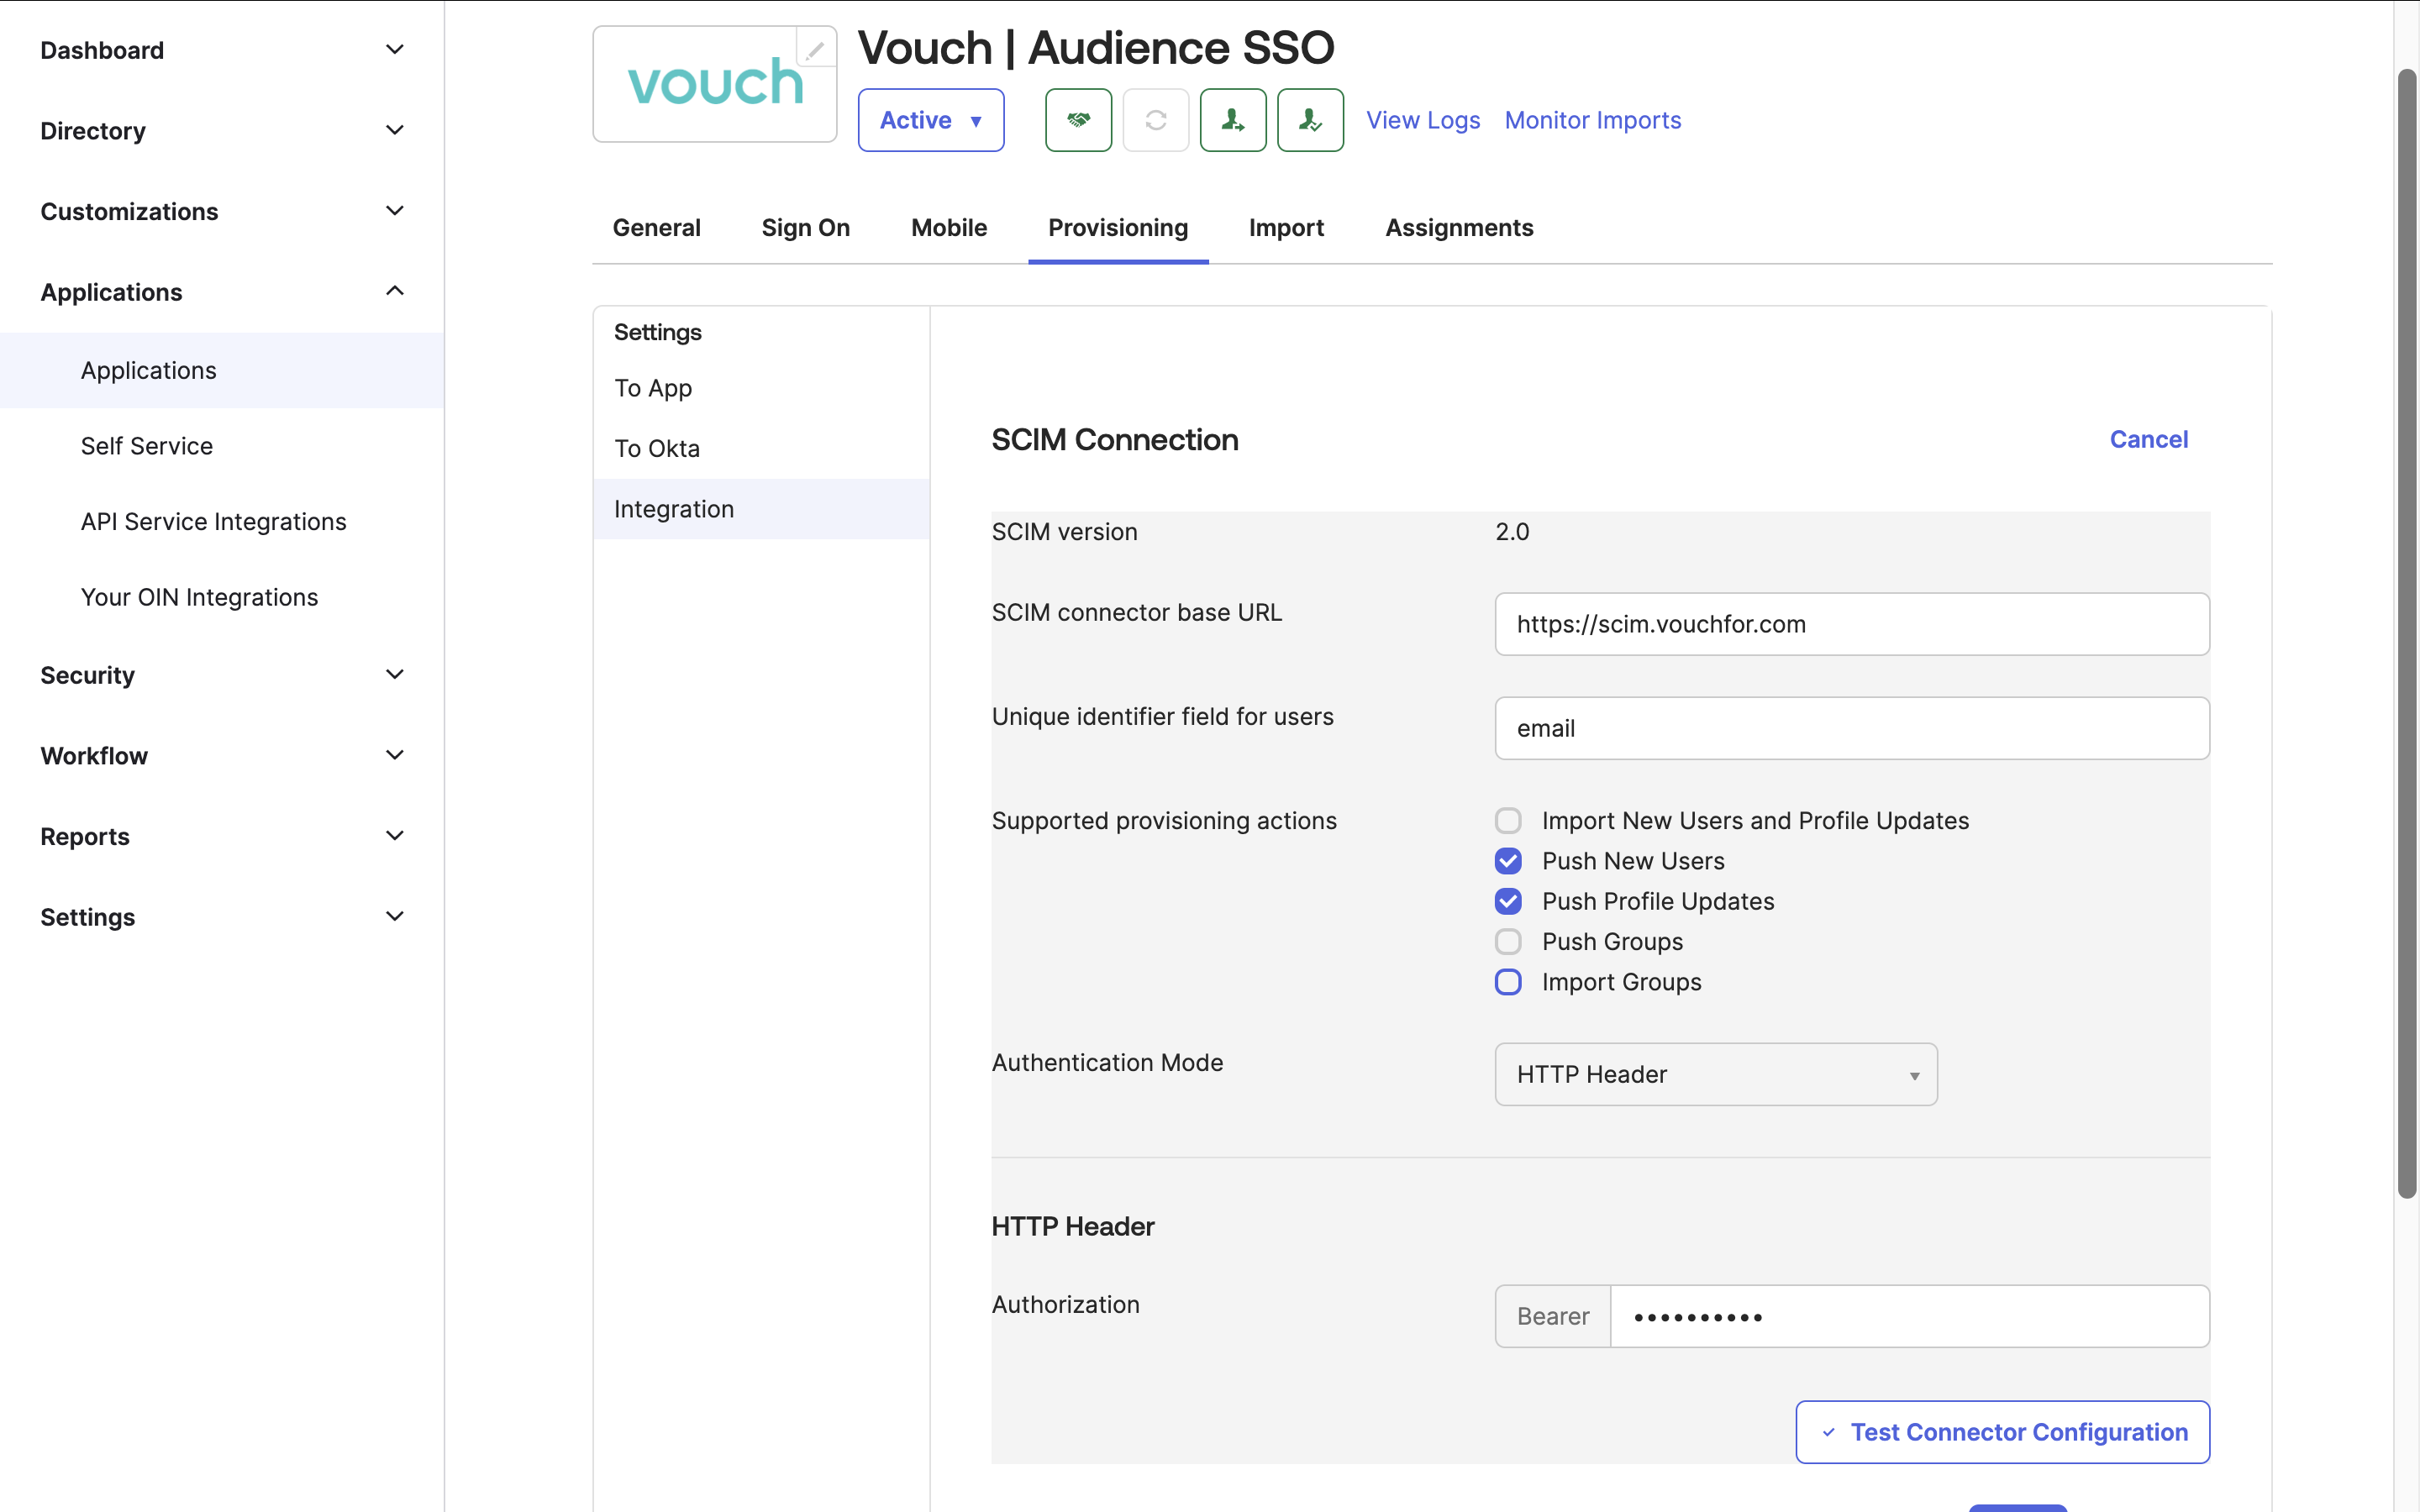
Once you have hit save, a new tab will be available within your app titled Provisioning. Click on this tab and click on Edit to start configuring your SCIM Connection.

In this section, you will want to add the following attributes to your SCIM Connection.
SCIM connector base URL:
https://scim.vouchfor.com
Unique identifier field for users:
email
Supported provisioning actions
You will want to tick at least Push Profile Updates.
Authentication Mode:
HTTP Header
Authorization:
An Bearer Token will be provided by your Vouch Customer Success Manager
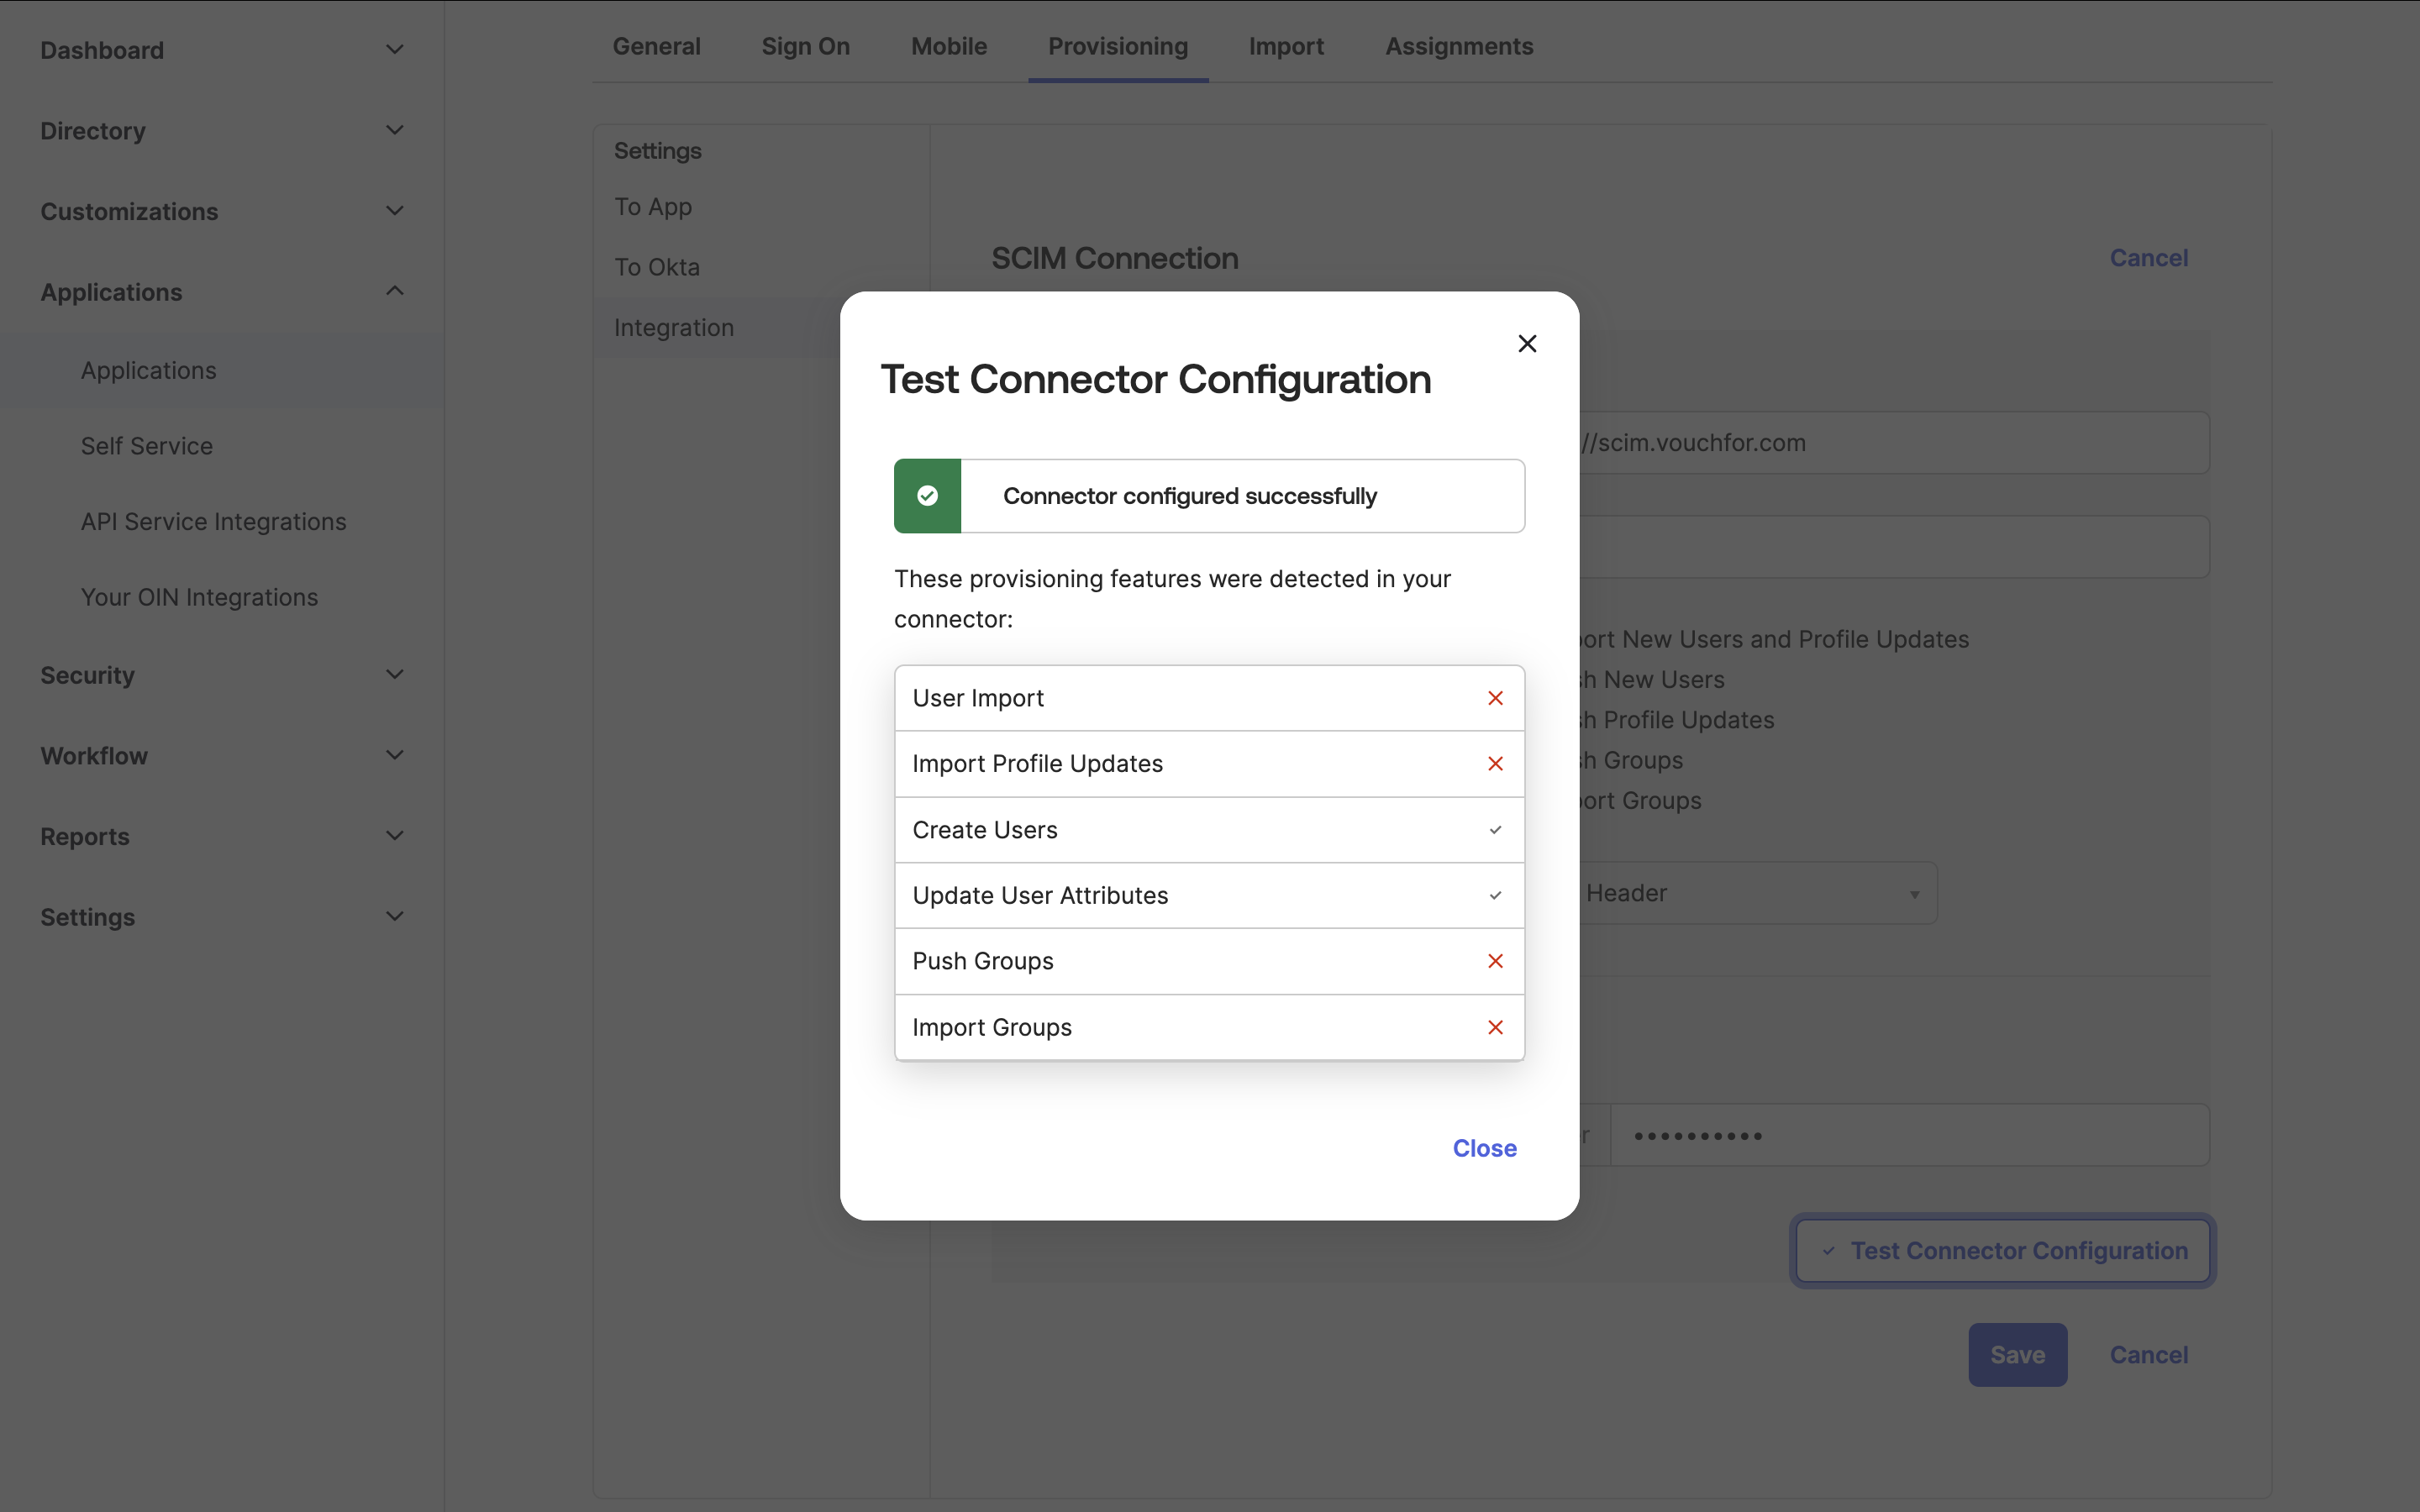
Once added, click Test Connector Configuration. Provided you have entered the correct credentials, you should see the following message from Okta.

You can now Save the settings.
Configure Additional Settings
Once you hit Save, you will be presented with two additional settings:
- To App
- To Okta
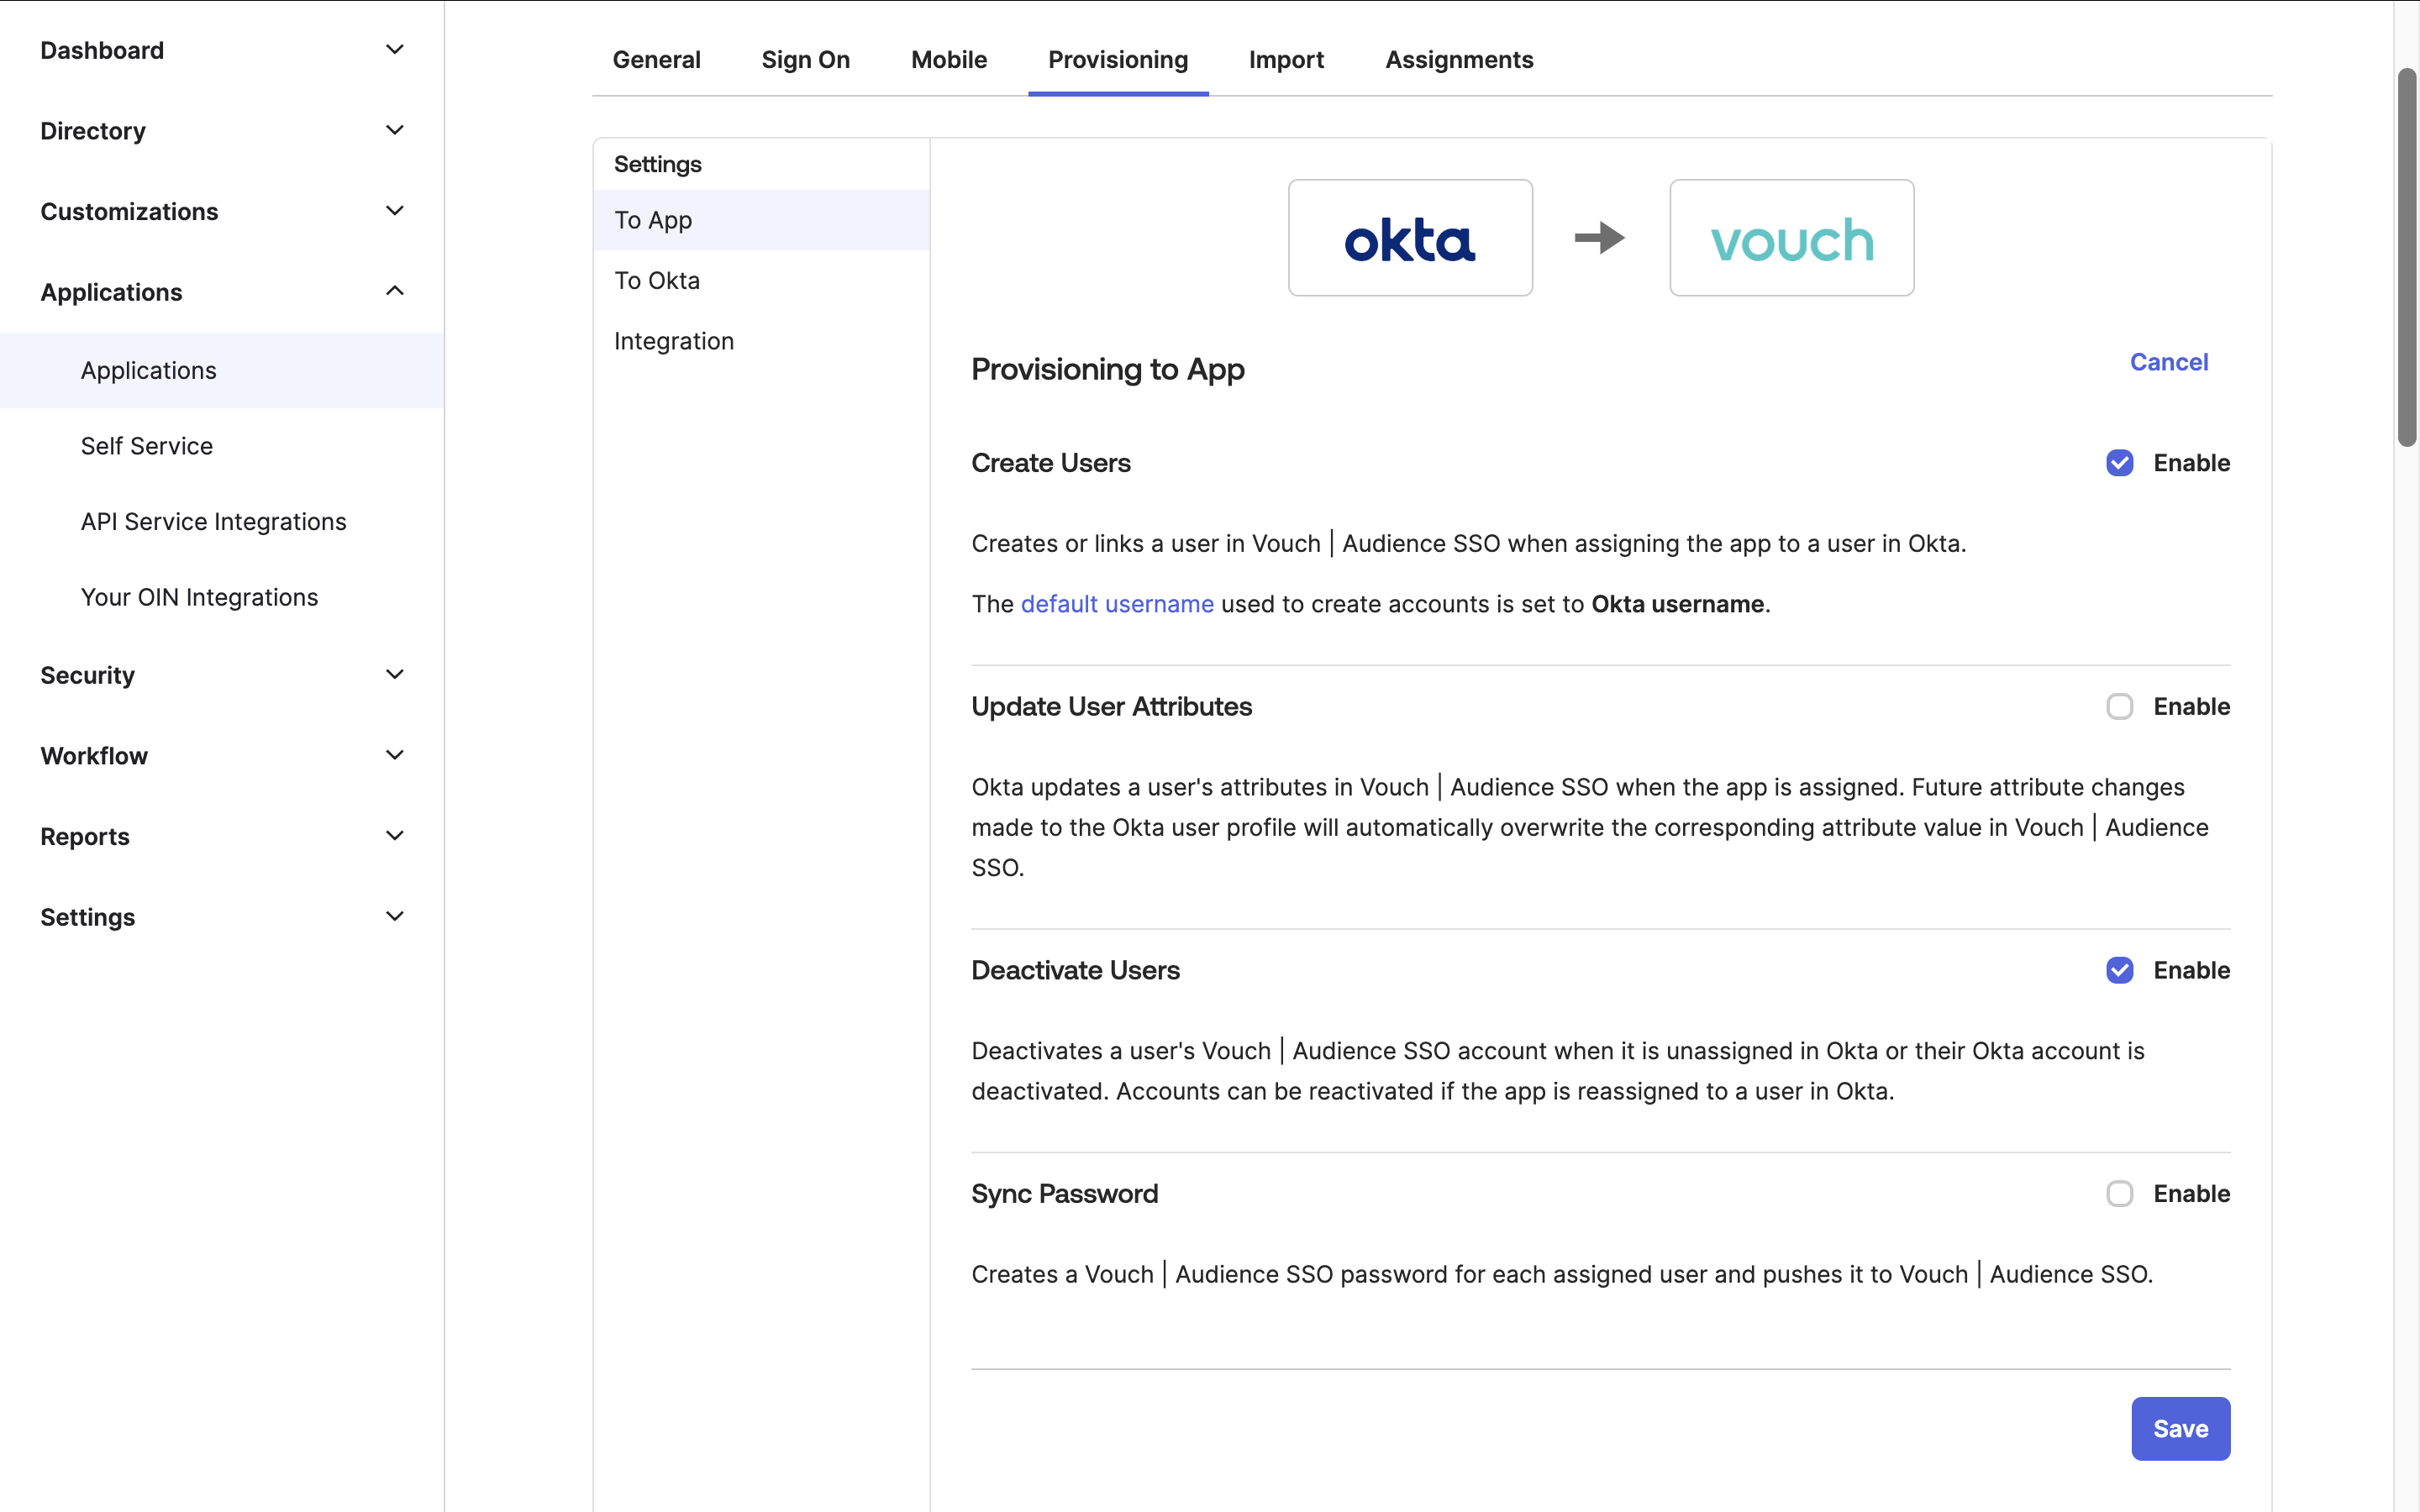
Click on To App and enable:
- Create Users
- Deactivate Users

Note: Vouch does not support Sync Password.
Once you have enabled this options, press Save. This will finalise the setup for SCIM.
Updated 5 months ago
