
Mobile applications
Adding Vouch Embed or Recorder to a mobile application
Customers are able to embed both the Vouch Web Embed and Vouch Recorder within a mobile application using Web Views. The following guide provides some high level concepts around how to add a Web View to your mobile application and considerations for adding either the Web Email or Recorder.
Considerations
Web Embed
Details around generating embed code for our Web embeds are available here
Recorder
Details around how to find the Vouch Recorder embed code are available here
Details around how to pre-populate user information on the Recorder are available here
iOS Mobile Application
The easiest way to add a Vouch Web Email or Recorder to an iOS Mobile Application is by leveraging the Web View feature available on iOS applications. The following guide provides the high level steps for achieving this in a blank Single View Application instance via xCode.
Add WebView to your iOS Mobile Application
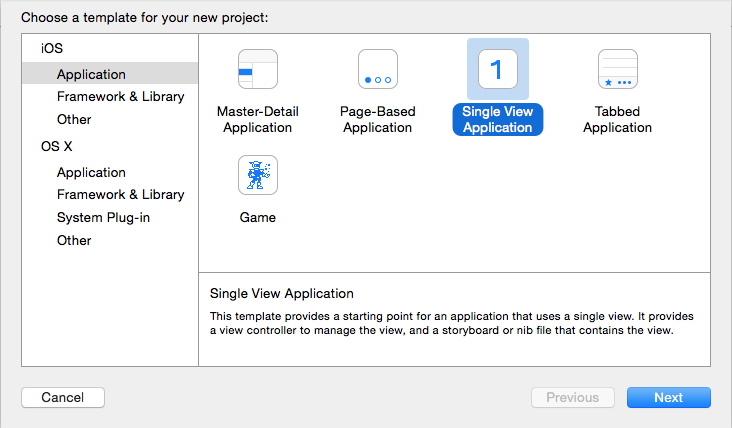
Within XCode, create a New Application with the following attributes:
- Template: Single View Application
- Application Name: WebView
- Language: Objective-C
- Devices: Universal
- Storyboards: True
And select where you would like to save the application files on your computer.
Once setup you will notice on there left there will be a series of pre-generated files. These files will be called AppDelegate, ViewController and Main.Storyboard.
Both AppDelegate and ViewController will have .a .h and .m version of the file.
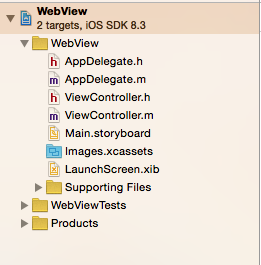
For the purpose of app building, .h is the header file (the file that tells the app what to do), and .m is the implementation file (the file that does what the header told it to do).
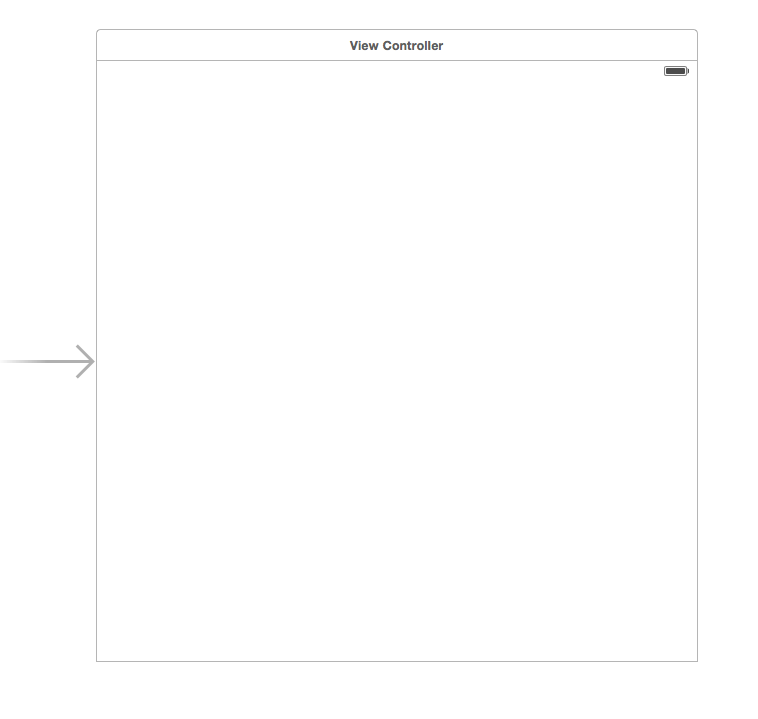
Add the WebView to the Storyboard
The first step is adding the WebView to the Main.storyboard file. Upon selecting the file, you will be presented with a screen similar to below:
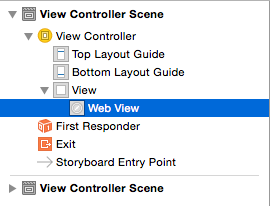
You will also be presented with an updated object list (located on the right hand side).
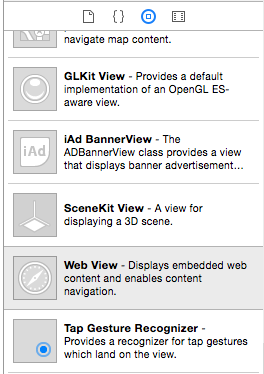
From this list find WebView and drag onto your Controller Canvas.
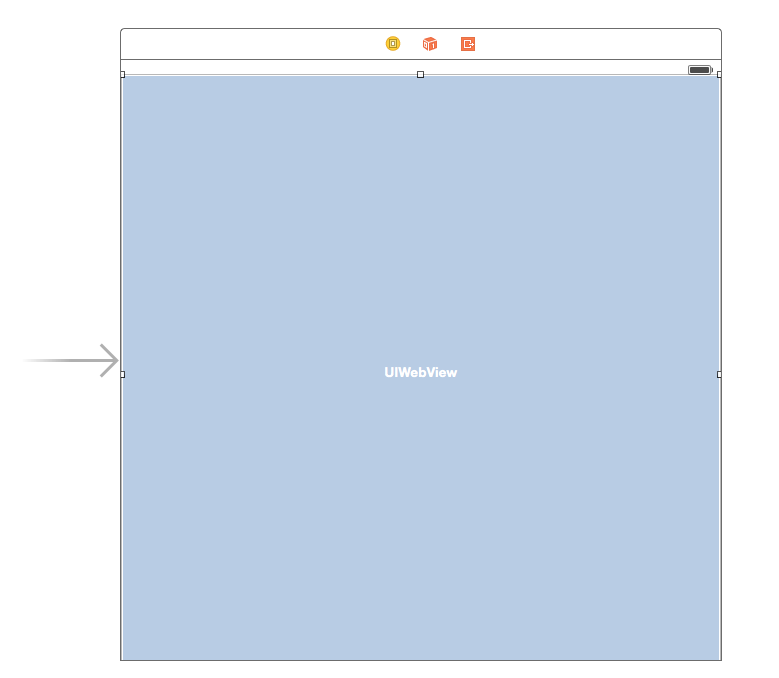
This will open up the View Controller Scene within XCode. From here, make sure View > Web View is selected.
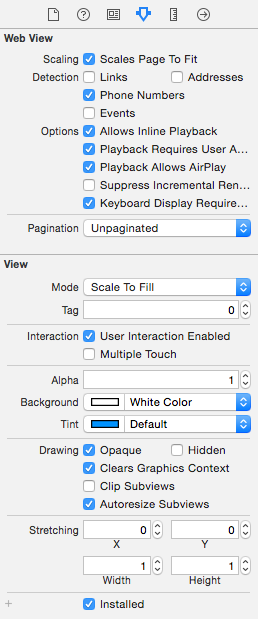
This will allow you to tweak the settings for the WebView within your Mobile Application.
Make sure within your settings you have ‘Scale Page to Fit’ selected.
Update ViewController.m
Next step is updating ViewController.m. Select the file from the left hand side. From the code that loads up, paste the following under the header #import "ViewController.h".
@interface ViewController ()
@end
@implementation ViewController

- (void)viewDidLoad {
      UIWebView \_webView = \[[UIWebView alloc] initWithFrame:self.view.frame];
      webView.scalesPageToFit = YES;
      NSString \_urlAddress = @"{iFrameEmbedURL}";
      NSURL \_url = [NSURL URLWithString:urlAddress];
      NSURLRequest \_request = [NSURLRequest requestWithURL:url];
      [webView loadRequest:request];
      webView.contentMode = UIViewContentModeScaleAspectFit;
      webView.scalesPageToFit = YES;
      webView.autoresizingMask=(UIViewAutoresizingFlexibleHeight |UIViewAutoresizingFlexibleWidth);
      [self.view addSubview:webView];
      [super viewDidLoad];
      // Do any additional setup after loading the view, typically from a nib.
  }
- (void)didReceiveMemoryWarning {
      [super didReceiveMemoryWarning];
      // Dispose of any resources that can be recreated.
  }
  @end
  Insert the iFrame Embed URL into the section {iFrameEmbedURL}
Once done, save and build your Mobile Application.
Android Mobile Application
The easiest way to add a Vouch Web Embed or Recorder to an Android Mobile Application is by leveraging the Web View feature available on Android applications. The following guide provides the high level steps for achieving this in a blank WebView Application within Android Tools.
Create Android WebView Application
Within Android Tools, select New Project and fill out the following attributes:
- Application Name: WebView Application
- Target Android Devices: Phone & Tablet
- Mobile Activity: Blank Activity
And select where you would like the application saved on your Computer.
Once setup you will notice on there left there will be a series of pre-generated files. The more important files to any Android App are:
src/main/java. Android Java source code.src/main/res. Resources used by the native application.src/main/res/drawable-type. Image resources used by the native application.src/main/res/layout. XML layout files that define the structure of UI components.src/main/res/values. Dimensions, strings, and other values that you might not want to hard-code in your application.src/main/AndroidManifest.xml. The manifest file defines what’s included in the application: activities, permissions, themes, and so on.
Add the WebView to the Main Activity Layout
Open the file res/layout/activity_main.xml and add the following code to the base of the document.
<WebView
 android:id="@+id/activity_main_webview"
 android:layout_width="match_parent"
 android:layout_height="match_parent" />
Update Main Activity Java Source Code:
Open the file java/vouch/webviewapplication/MainActivity.java and add the following highlighted code to the document.
package vouch.webviewapplication;

import android.support.v7.app.ActionBarActivity;
import android.os.Bundle;
import android.view.Menu;
import android.view.MenuItem;
import android.webkit.WebSettings;
import android.webkit.WebView;


public class MainActivity extends ActionBarActivity {

    @Override
    protected void onCreate(Bundle savedInstanceState) {
        super.onCreate(savedInstanceState);
        setContentView(R.layout.activity_main);

        WebView mWebView = (WebView) findViewById(R.id.activity_main_webview);

        WebSettings webSettings = mWebView.getSettings();
        webSettings.setJavaScriptEnabled(true);
        mWebView.setInitialScale(1);
        mWebView.getSettings().setJavaScriptEnabled(true);
        mWebView.getSettings().setLoadWithOverviewMode(true);
        mWebView.getSettings().setUseWideViewPort(true);
        mWebView.setScrollBarStyle(WebView.SCROLLBARS_OUTSIDE_OVERLAY);
        mWebView.setScrollbarFadingEnabled(false);

        mWebView.loadUrl("URL to Widget Parent Page");
    }

    // ... rest of the code
}
}
This code ensures that the standard Android WebSettings and WebView kit are imported.
import android.webkit.WebSettings;- i
mport android.webkit.WebView;
Whilst this code determines the rendering of the app within the Web View.
WebView mWebView = (WebView) findViewById(R.id.activity_main_webview);WebSettings webSettings = mWebView.getSettings();webSettings.setJavaScriptEnabled(true);mWebView.setInitialScale(1);mWebView.getSettings().setJavaScriptEnabled(true);mWebView.getSettings().setLoadWithOverviewMode(true);mWebView.getSettings().setUseWideViewPort(true);mWebView.setScrollBarStyle(WebView.SCROLLBARS_OUTSIDE_OVERLAY);mWebView.setScrollbarFadingEnabled(false);
This final line of code tells the Mobile Application what URL to load:
mWebView.loadUrl("URL to Widget Parent Page");
Update Android Manifest
Open the file /manifests/AndroidManifest.xml and add the following line of code right after the parameter <application>.
Updated 10 months ago